
A Step-by-Step Guide for Beginners
Welcome! This guide walks you through everything you need to contribute to a shared project on GitHub. By the end, you will have made a real contribution to the class repository. Don't worry if some steps feel unfamiliar — we will go through each one slowly and clearly.
BEFORE YOU START
This tutorial assumes you have Git installed and a GitHub account. If you haven't done either yet, jump back to the previous two chapters.
Part 1: Quick Refresher — Git & GitHub Basics
Before we dive in, let's refresh the key ideas you've already learned.
What is Git? Git is a tool you run on your own computer. It tracks every change you make to your files — like an undo button that goes back months. Every project tracked by Git is called a repository (or repo for short).
What is GitHub? GitHub is a website that stores your Git repositories in the cloud. It lets you share your work with others, see their changes, and combine everyone's work together safely.
A repository: A folder that Git is tracking, i.e a shared school notebook
Clone: Download a repo to your computer, i.e photocopying that notebook
Branch: Your own working copy, i.e your personal draft
Commit: Save a snapshot of your changes, i.e pressing Save after writing
Push: Upload your changes to GitHub, i.e handing in your homework
Pull request: Ask to merge your changes into the main project, i.e asking the teacher to add your work to the class copy
Key Git Commands
Here are the commands you have already learned — we will use all of these today:
  git clone          → Copy a repository to your computer
  git status              → See what files have changed
  git add       → Stage (prepare) a file to be saved
  git commit -m 'msg'     → Save a snapshot with a description
  git push                → Upload your changes to GitHub
  git pull                → Download the latest changes from GitHub
  git checkout -b   → Create and switch to a new branch
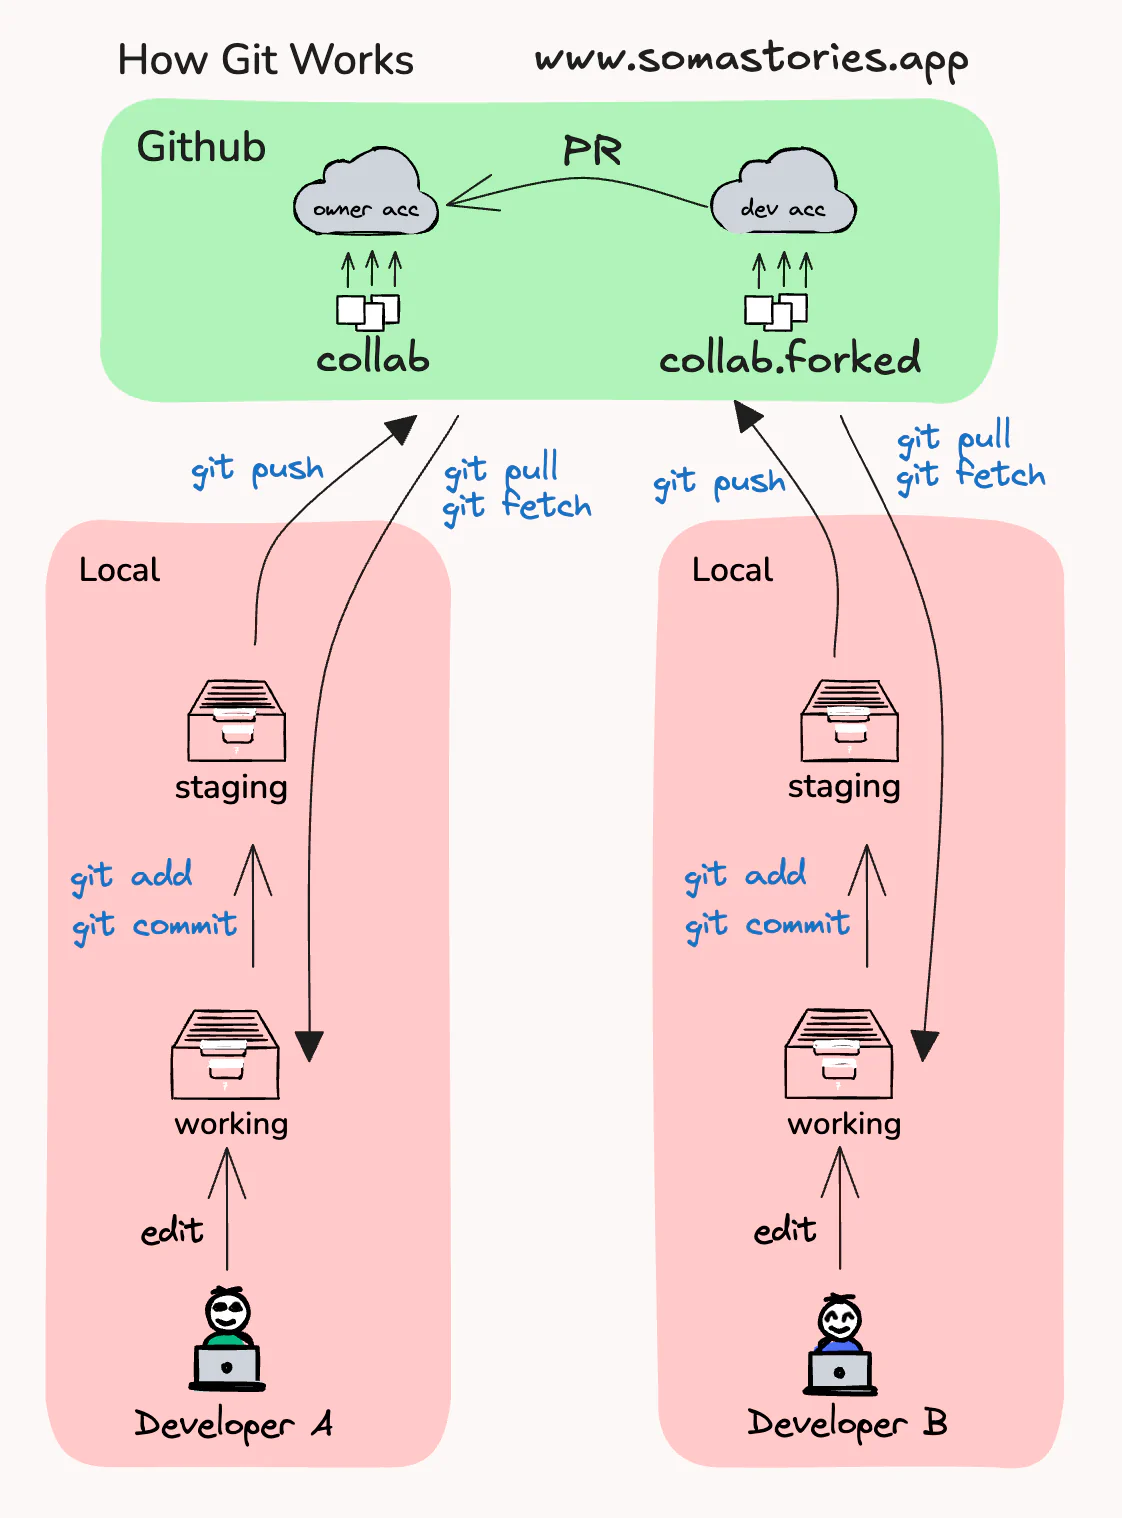
Part 2: Setting Up Your Tools
Before contributing to the project, make sure everything is installed and configured on your computer.
Step 1 — Install Git
If you haven't installed Git yet, follow these steps for your operating system:
Windows
- Go to https://git-scm.com/download/win in your browser.
- Download the installer and run it. Accept all the default settings when prompted.
- When installation finishes, open the Start menu, search for Git Bash, and open it.
- You will use Git Bash as your terminal for all the commands in this tutorial.
Mac
- Open the Terminal app (press Cmd + Space, type Terminal, press Enter).
- Type the command below and press Enter. Follow any prompts that appear on screen.
xcode-select --install
Step 2 — Create a GitHub Account
- Go to https://github.com in your browser.
- Click Sign up and follow the steps to create a free account.
- Verify your email address when GitHub sends you a confirmation email.
Step 3 — Tell Git Who You Are
Git needs to know your name and email so your contributions are labelled correctly. Open your terminal and type these two commands, replacing the example text with your own details:
  git config --global user.name "Your Full Name"
  git config --global user.email "your@email.com"
✅ CHECK
To confirm it worked, type: git config --global user.name — it should print back your name.
Part 3: Finding the Class Repository on GitHub
The class project lives at the following GitHub address: https://github.com/somastorieske/collab
- Open your web browser and type that address into the address bar, then press Enter.
- You should see the repository page — it shows the project's files, a description, and the history of all changes.
- Take a moment to look around. Notice the list of files, the green Code button, and the Issues and Pull requests tabs at the top.
LOOK: See the README file? It usually contains instructions for the project. Scroll down on the repo page to read it.
Getting the Clone URL
- On the repository page, click the green button labelled Code.
- A small box will appear. Make sure the HTTPS tab is selected (not SSH).
Click the copy icon...